OneCloud Integrations | How to Setup the Salesforce Integrator
Guide to Setting Up the Salesforce Integrator in the UCaaS Portal

Please Note: To use the Integrator, you need an admin account setup in Salesforce

User/Agent Identity: The OneCloud Portal uses email addresses through the integrator to Salesforce for identification.
If there's no email on the UCaaS Agent/User, the Salesforce admin can add the user's extension number in Salesforce to be identified by the integrator.
If there's no email on the UCaaS Agent/User, the Salesforce admin can add the user's extension number in Salesforce to be identified by the integrator.
📋 Setup Steps
2. Access the Integration Tab

3. Select the "Salesforce" Integrator's Enable Button
(This will open a new window)
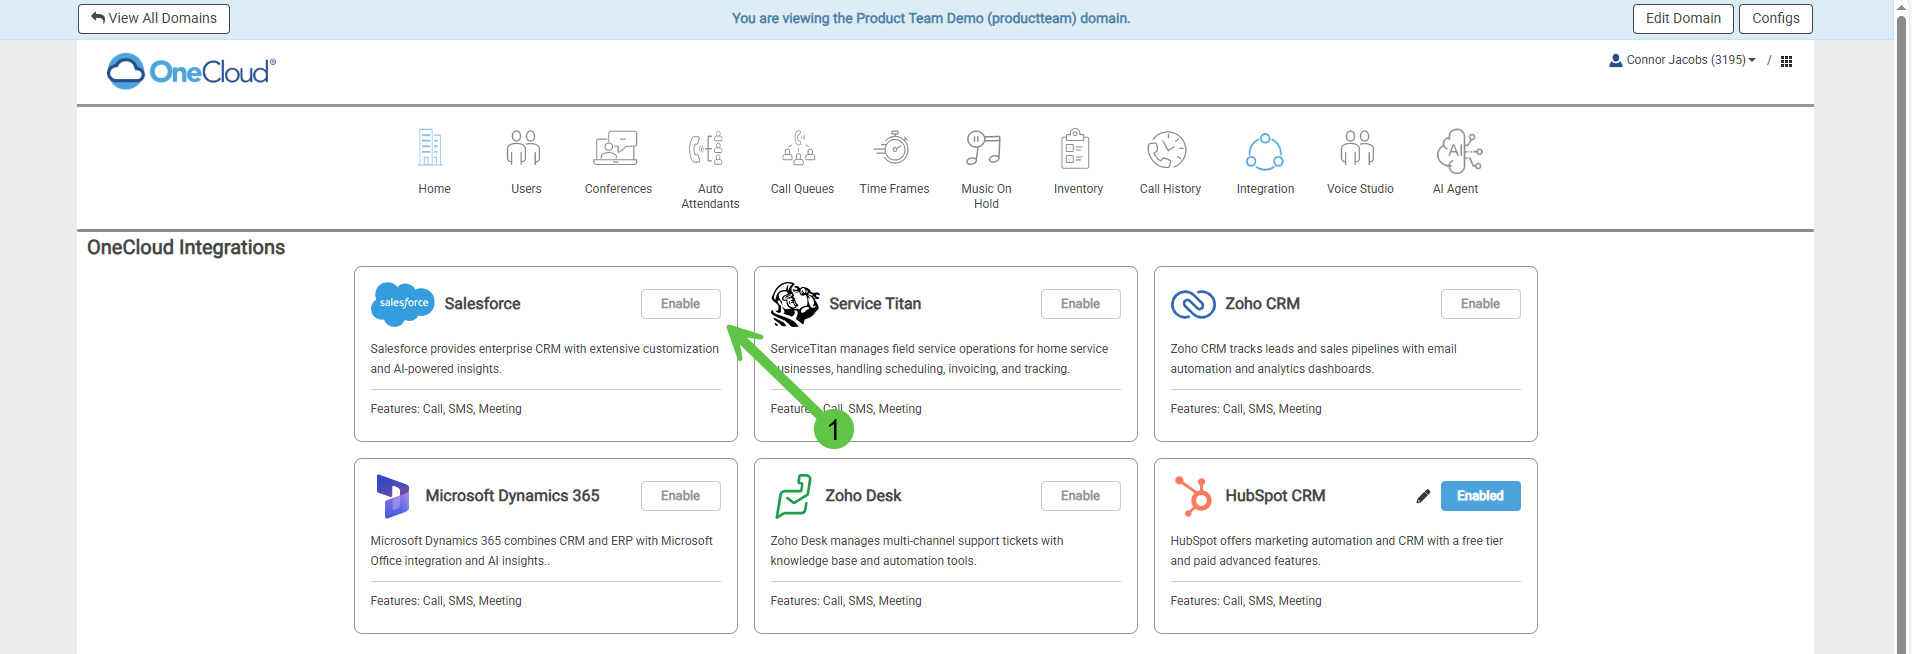
(This will open a new window)
4. Log in to your Salesforce
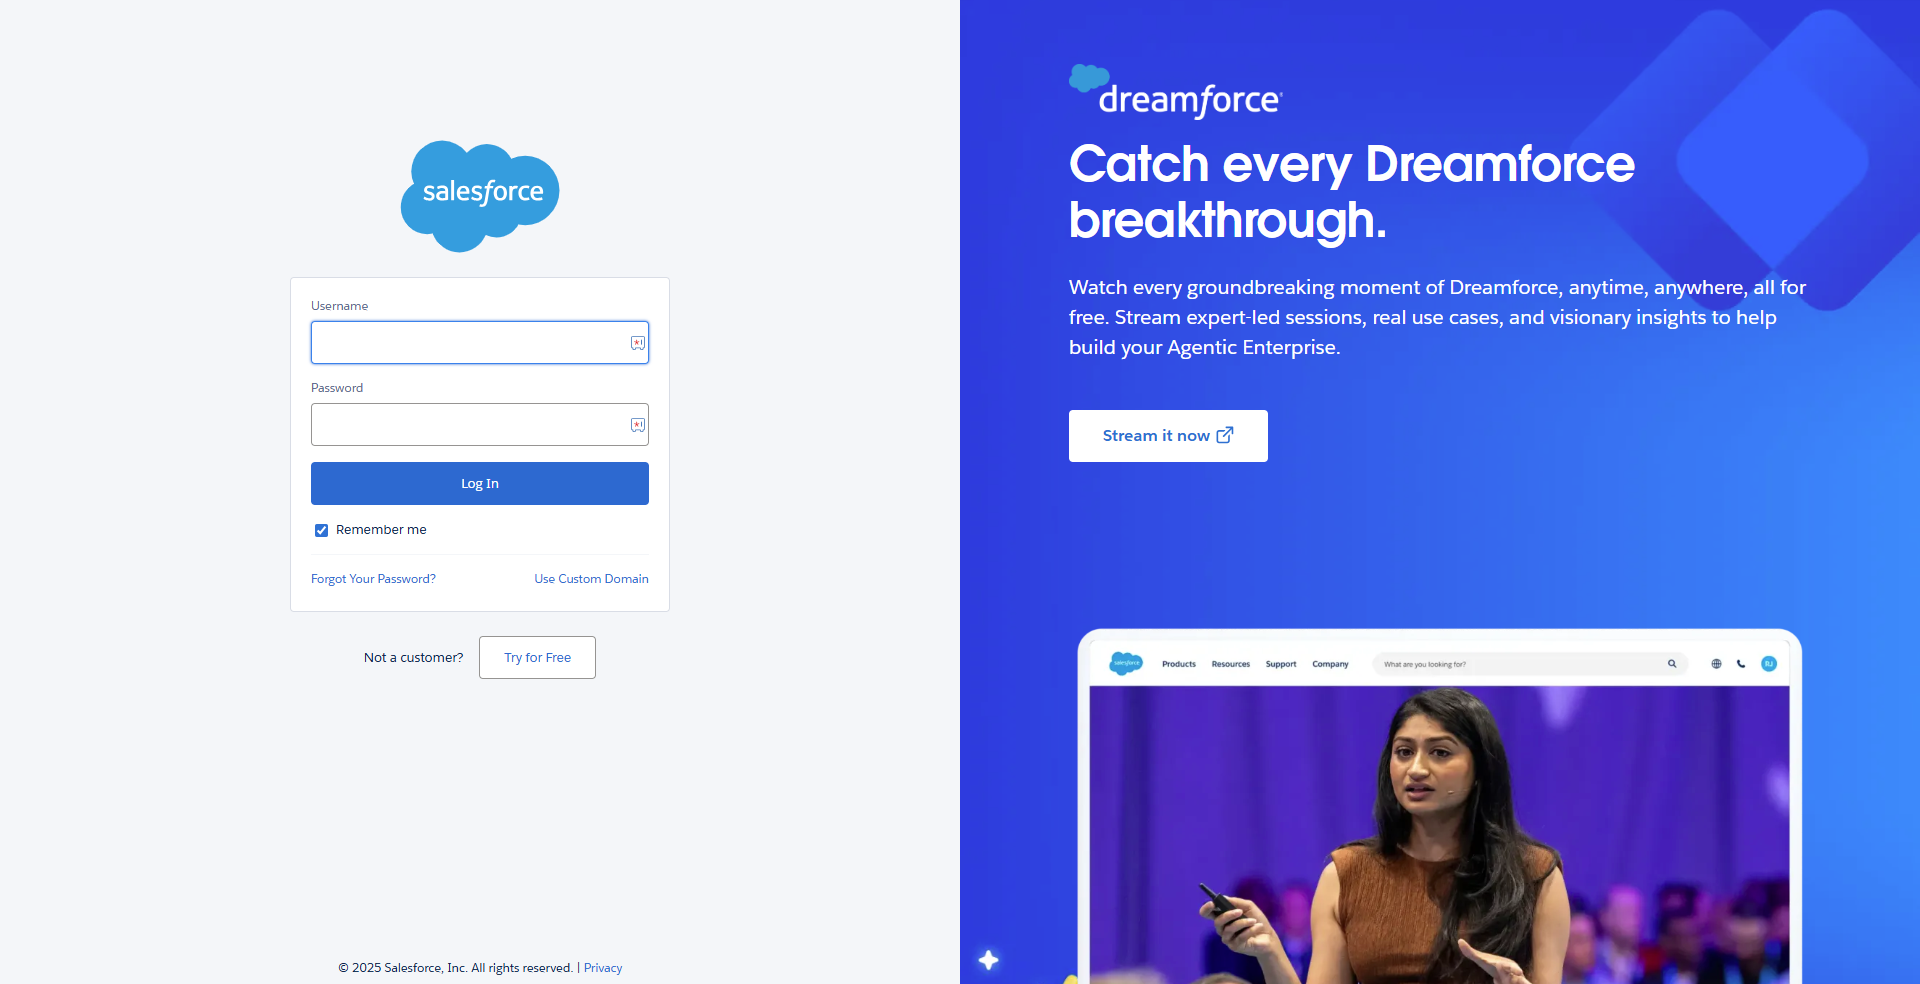
5. Allow Access for the Connection
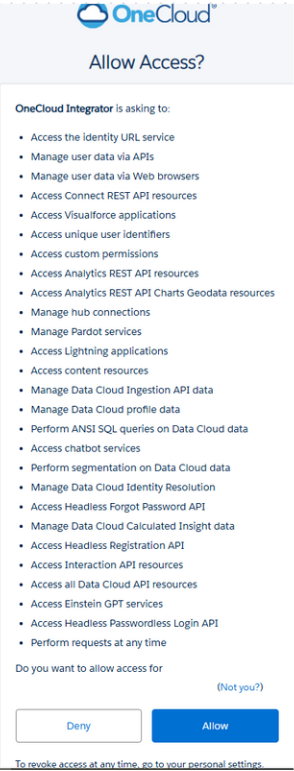
6. Integration Successfully Connected
a. Confirmation Message:

Enabled Integration Icon:

a. Confirmation Message:
Enabled Integration Icon:
7. Adding Users to the Integrator
a. Hit the "Pencil Icon"

b. Enable Users for Calls, SMS, and Meetings Data
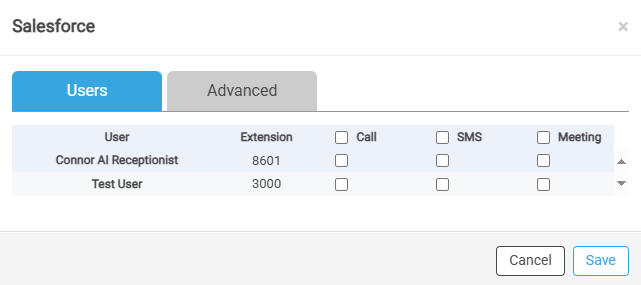
a. Hit the "Pencil Icon"
b. Enable Users for Calls, SMS, and Meetings Data
8. Adding Extension Numbers in Salesforce

This step is crucial for identification if the user in UCaaS does not have an email address associated to it.
Please Note: The steps below are in SalesForce Lightning
Please Note: The steps below are in SalesForce Lightning
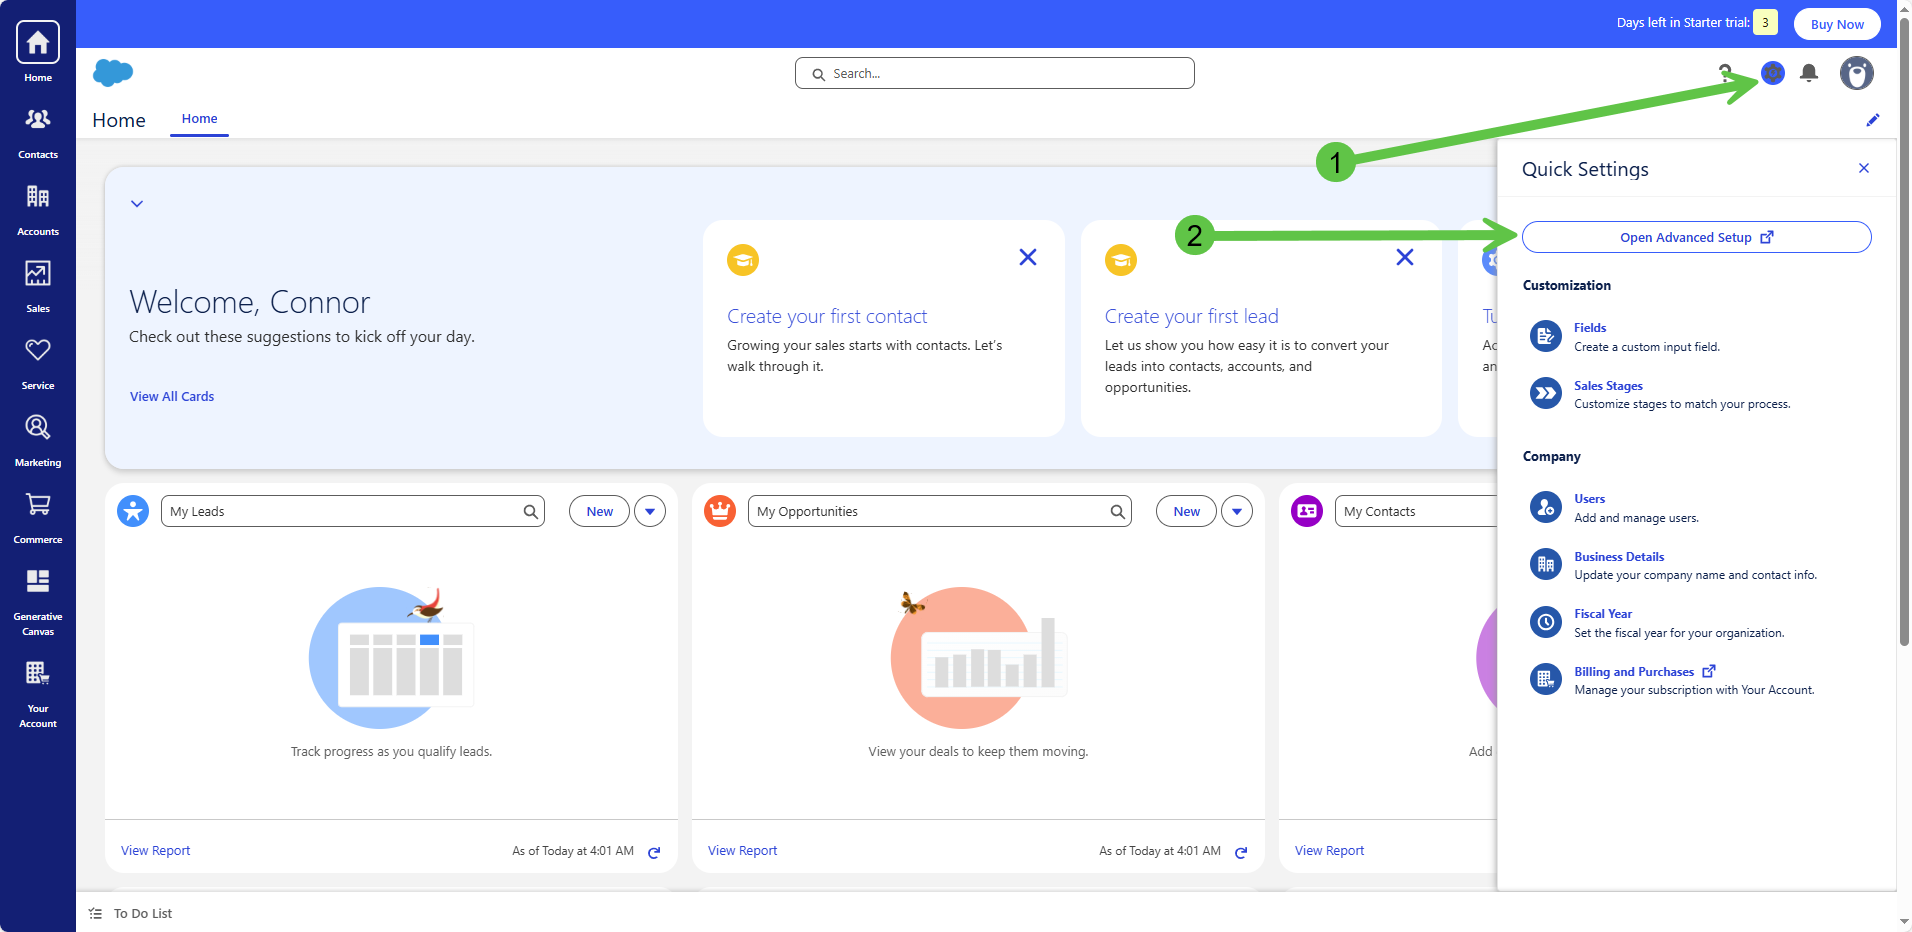
a. Go to Settings via the Gear Icon and then Advanced Setup
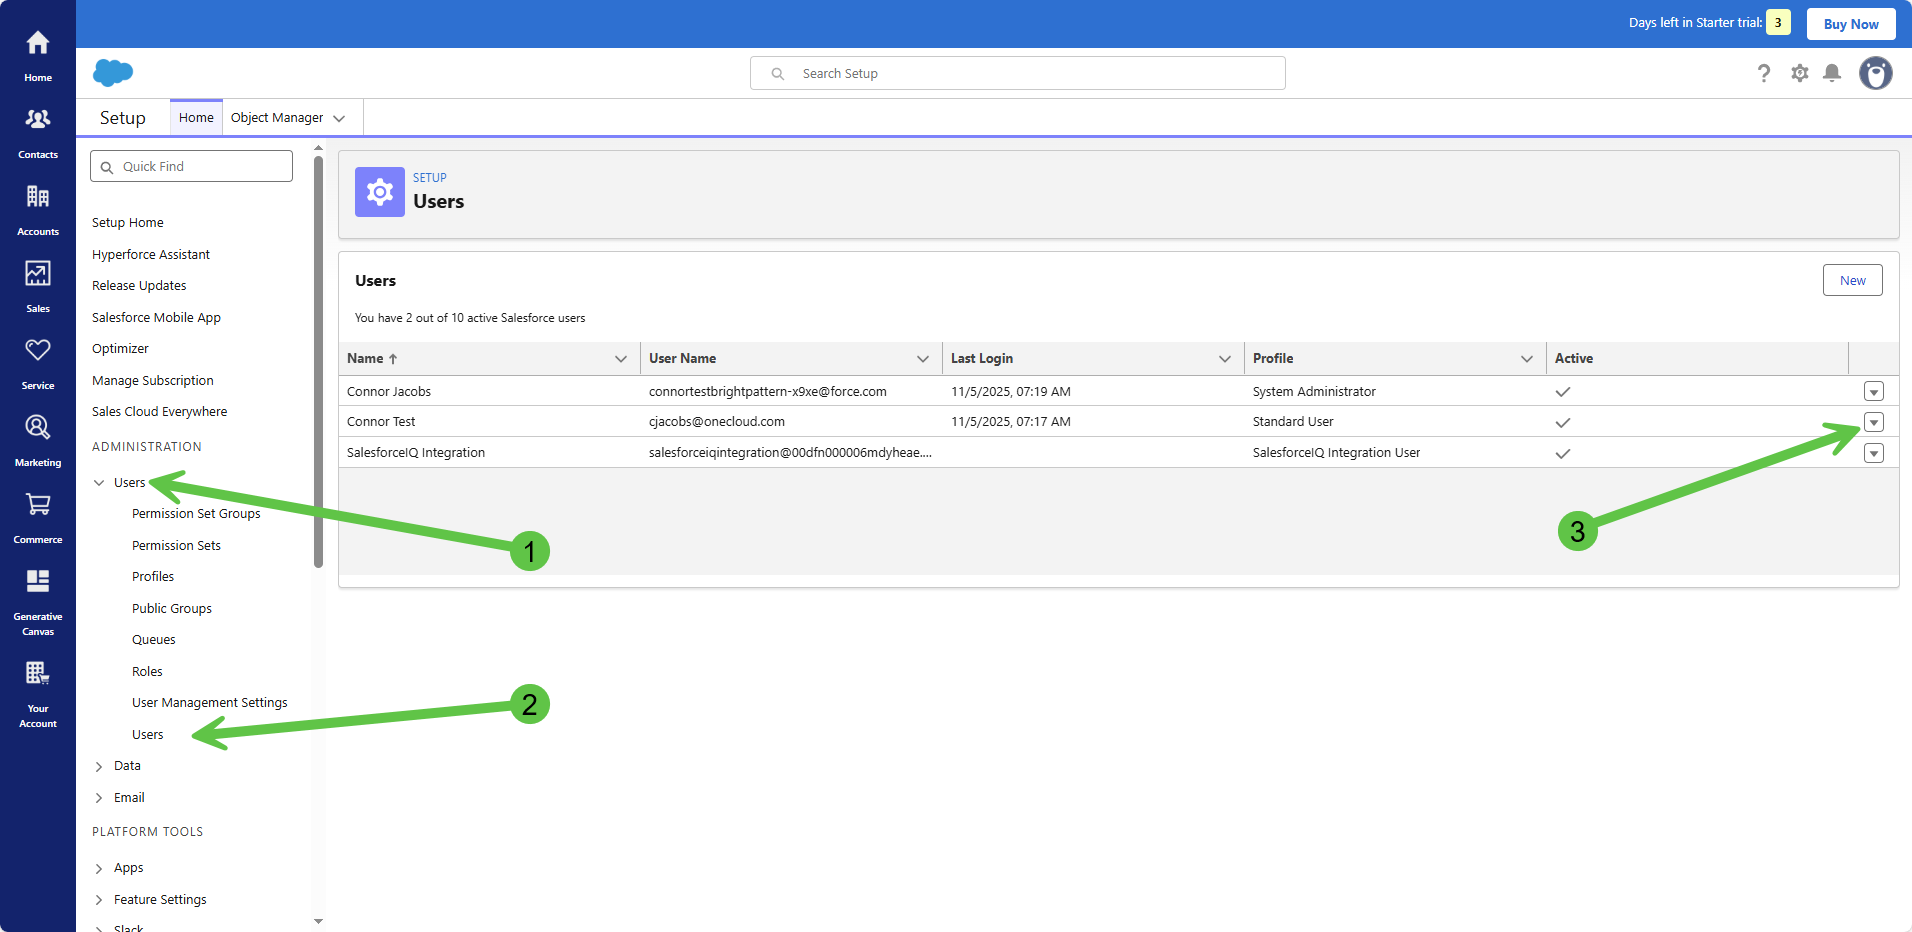
b. Go to Users under "Administration" column and go to "Users" then select the drop-down arrow to the right of the specific user
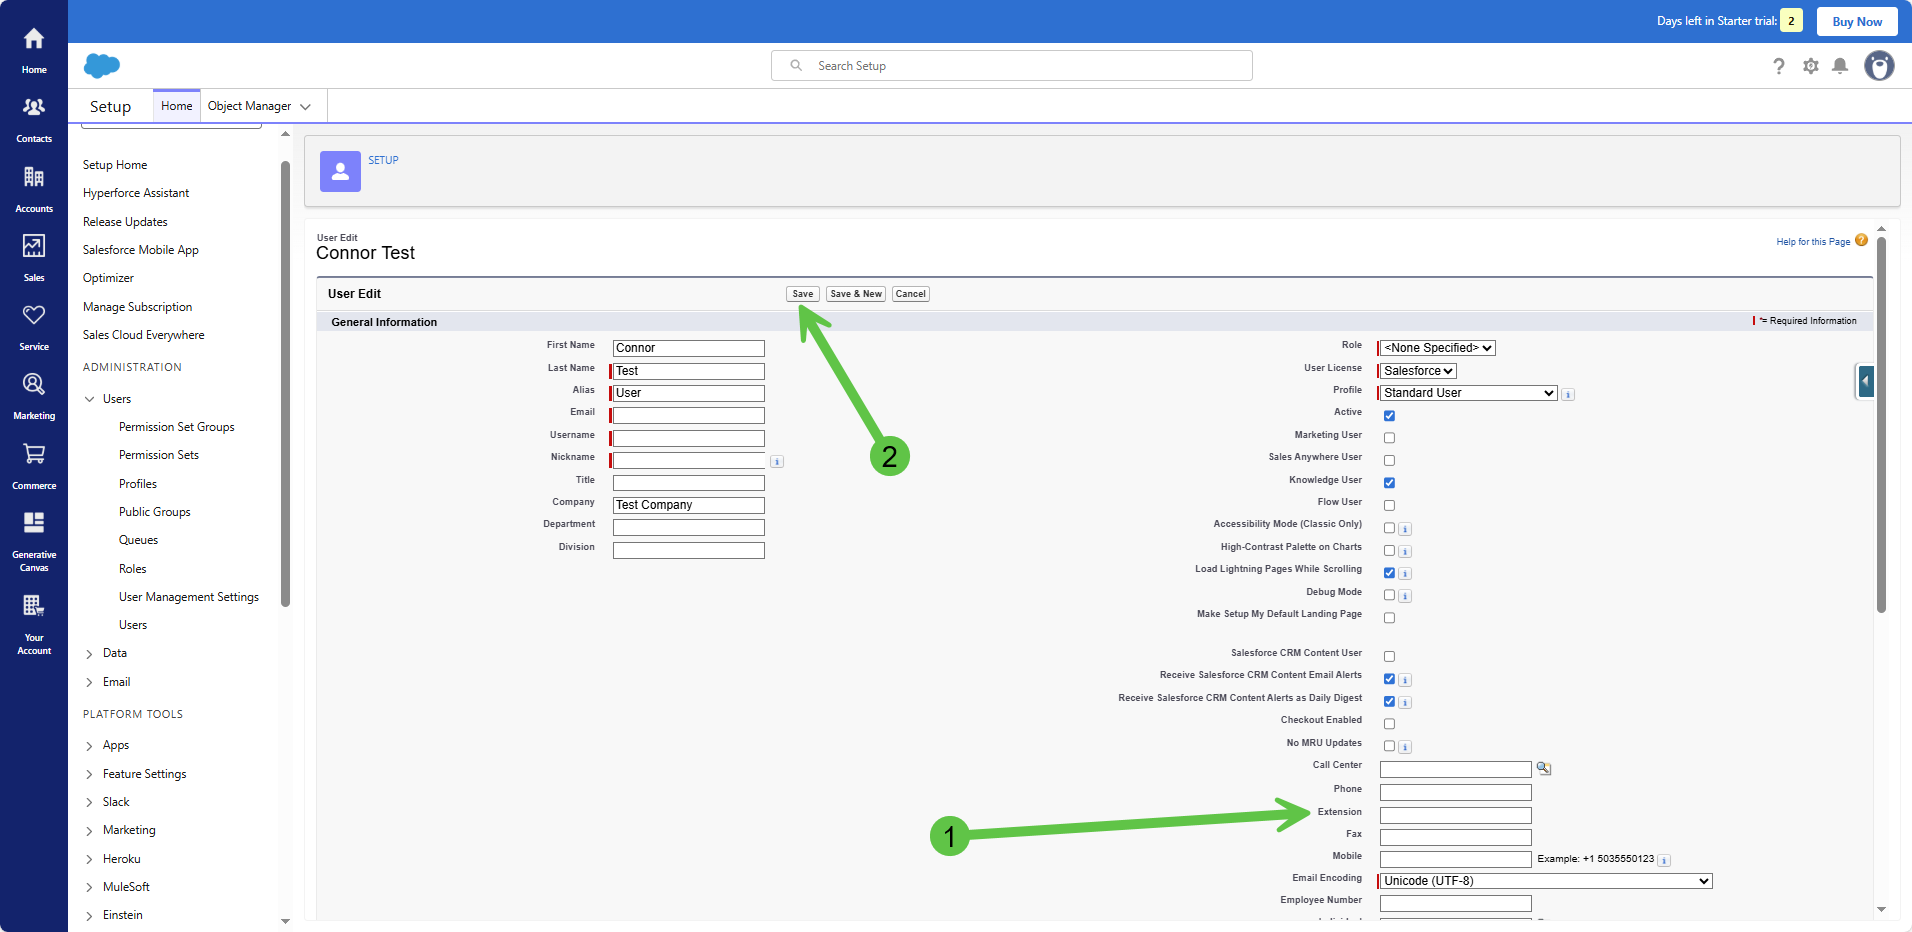
c. Select "Edit User" Under the Drop-Down Arrow from above then scroll down to the extension field and add the "Extension" Number
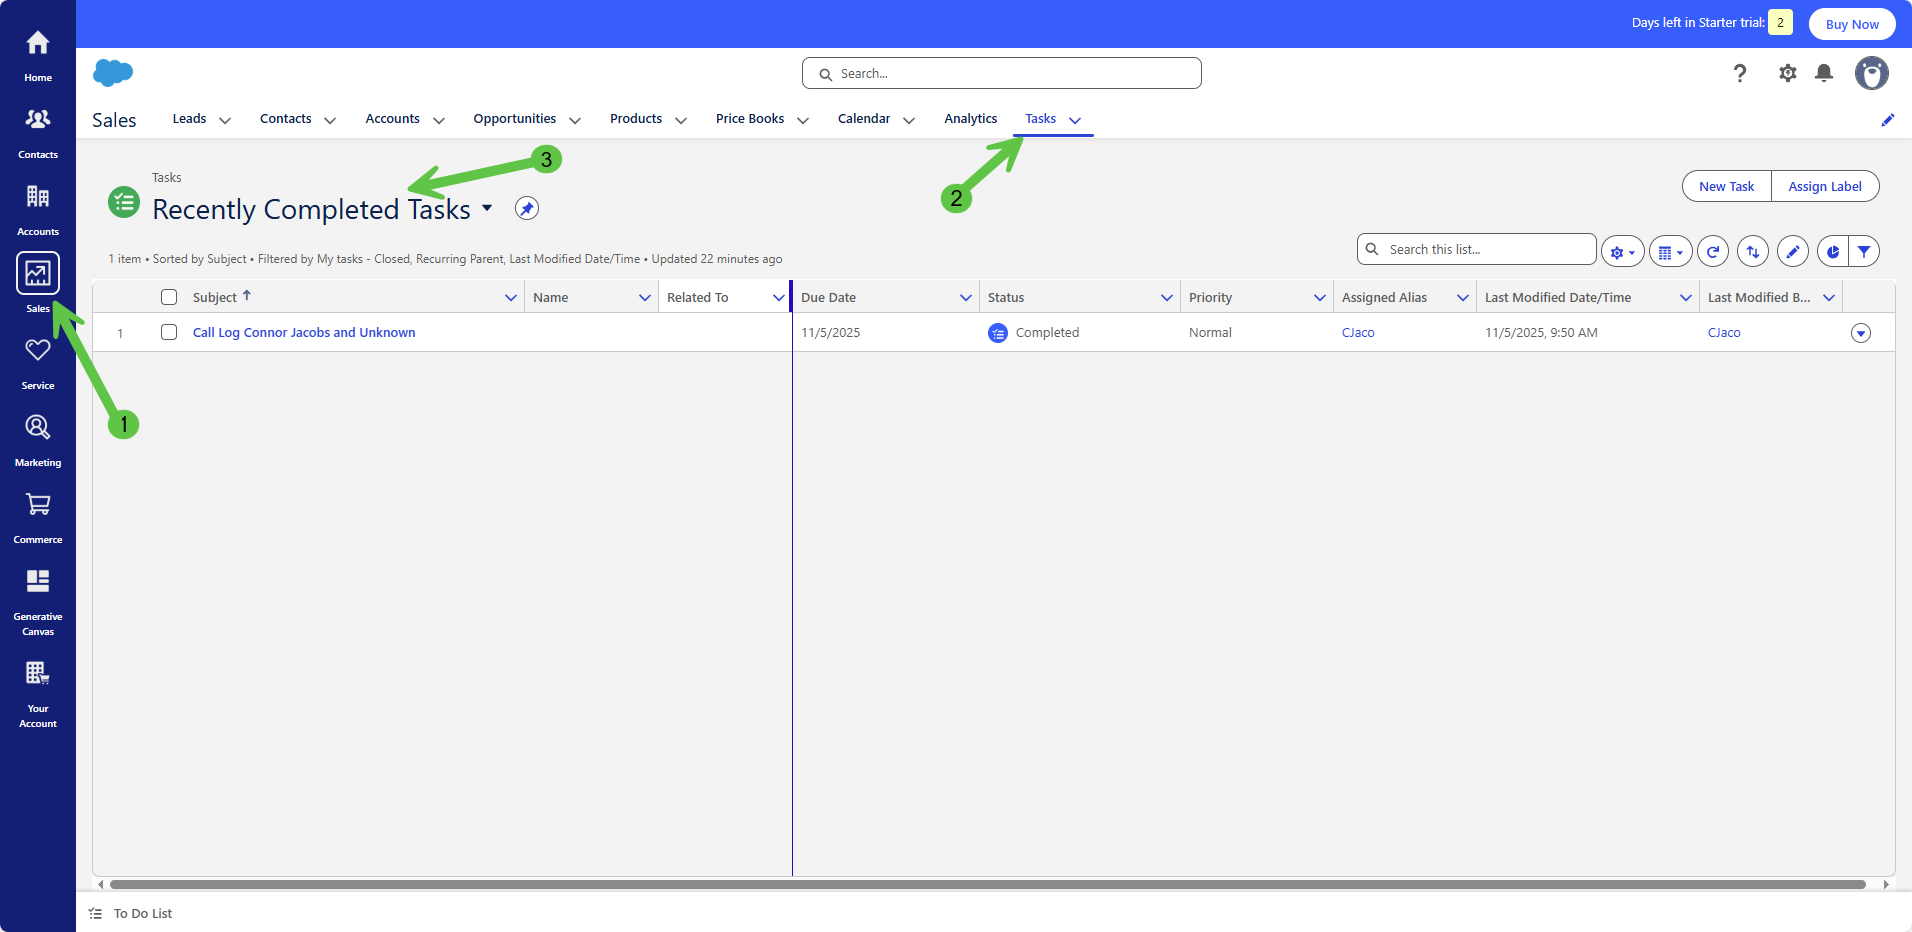
9. Setup Complete: Navigate to Sales > Tasks Column > Search for Recently Completed Tasks
Call Example:
c. Select "Edit User" Under the Drop-Down Arrow from above then scroll down to the extension field and add the "Extension" Number
9. Setup Complete: Navigate to Sales > Tasks Column > Search for Recently Completed Tasks
Call Example:

If you have any questions or issues, please feel free to reach out to OneCloud Support.
Related Articles
OneCloud Integrations | How to Setup Service Titan Integrator in the UCaaS Portal
OneCloud Integrations | How to Setup Service Titan Integrator in the UCaaS Portal Please Note: You must be an Office Manager in the UCaaS Portal and an Administrator within the Service Titan CRM to configure this Integrator Step 1: Login to UCaaS ...OneCloud Integrations | How to Setup the Zoho Desk Integrator in UCaaS Portal
OneCloud Integrations | How to Setup the Zoho Desk Integrator in UCaaS Portal Administrator Access Required: To set up this integration, you will need administrator access to your Zoho Desk account. User Identity Matching: Email Address ...OneCloud Integrations | How to Setup the Zoho CRM Integrator in UCaaS Portal
OneCloud Integrations | How to Setup the Zoho CRM Integrator in UCaaS Portal ? Administrator Access Required To set up this integration, you will need administrator access to your Zoho CRM account. ⚠️ User Identity Matching Email Address ...OneCloud Integrations | How to Setup the Microsoft Dynamics 365 Integrator in UCaaS Portal
How to Setup the Microsoft Dynamics 365 Integrator in UCaaS Portal Administrator Access Required To set up this integration, you will need administrator access to your Microsoft Dynamics 365 account. User Identity Matching Email Address ...OneCloud Chrome CRM Integrator User Guide | OneCloud Support Portal
Navigation 1. Close Extension 2. Quick Call 3. Screen Pop CRM Choice – Select the appropriate CRM software (or search engine) in the top right of the application. 4. Link to OneCloud Portal – Use this icon to quickly navigate to the OneCloud portal. ...